Setting up a Multi-Node Hadoop Cluster on Google Cloud
In this tutorial, we will walk through the process of setting up a multi-node Hadoop cluster on Google Cloud. This cluster will consist of one master node and two worker nodes. We will be using Google Cloud VM instances for this setup, this tutorial assumes one has a basic understanding of setting up VMs and firewall rules on GCP.
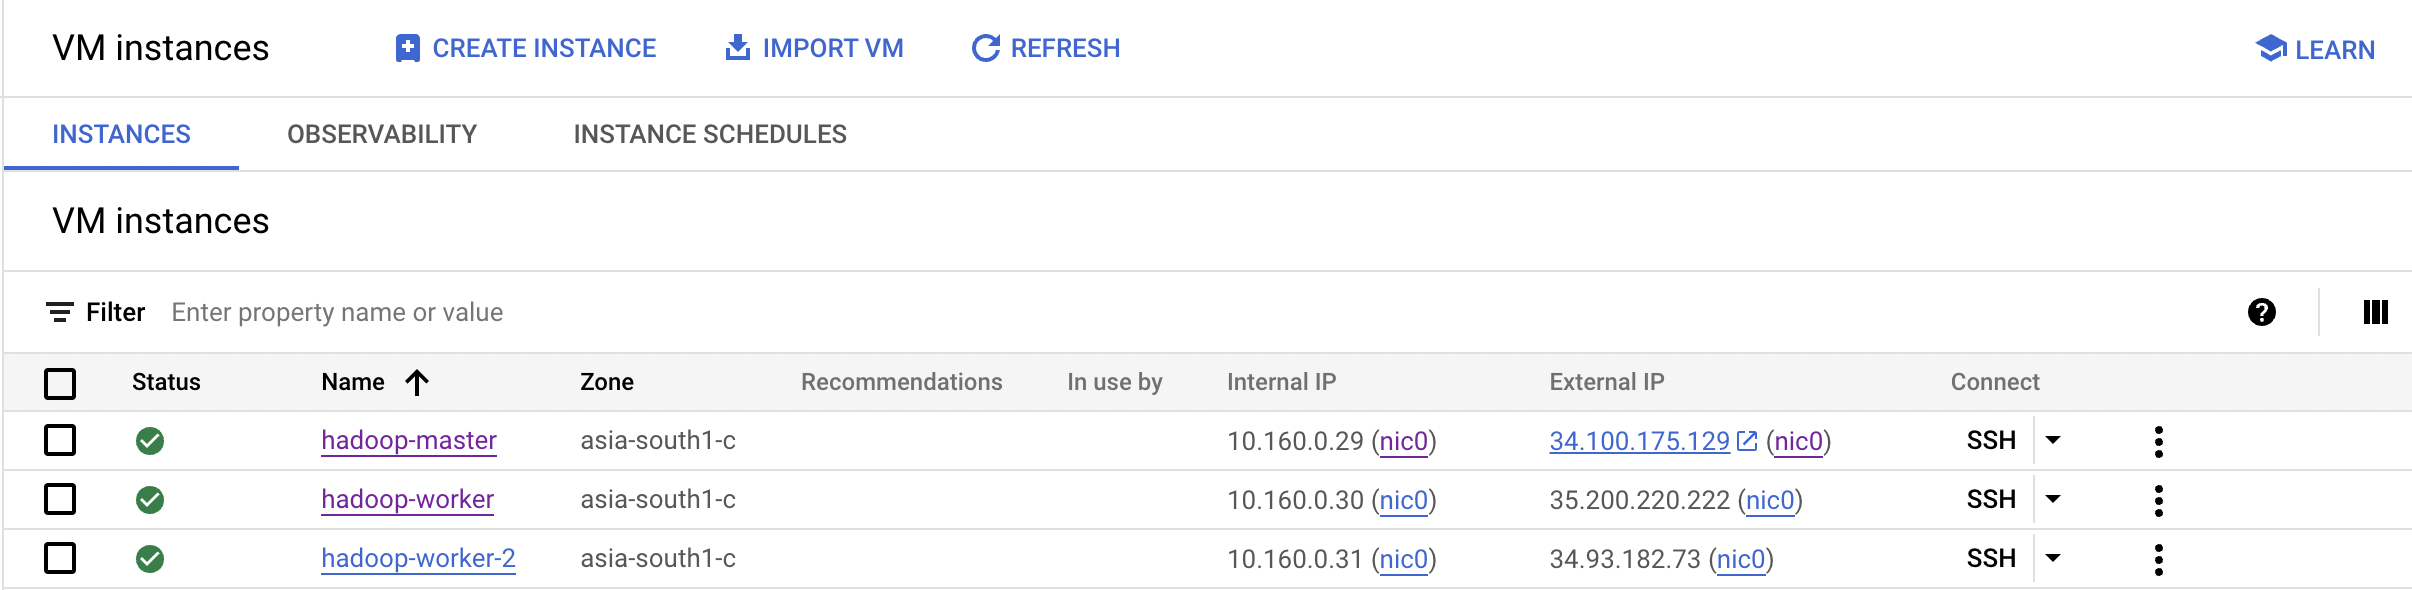
Step 1: Create VM Instances
Create 2 identical VM instances as worker nodes.
Create 1 more VM instance for the master node.
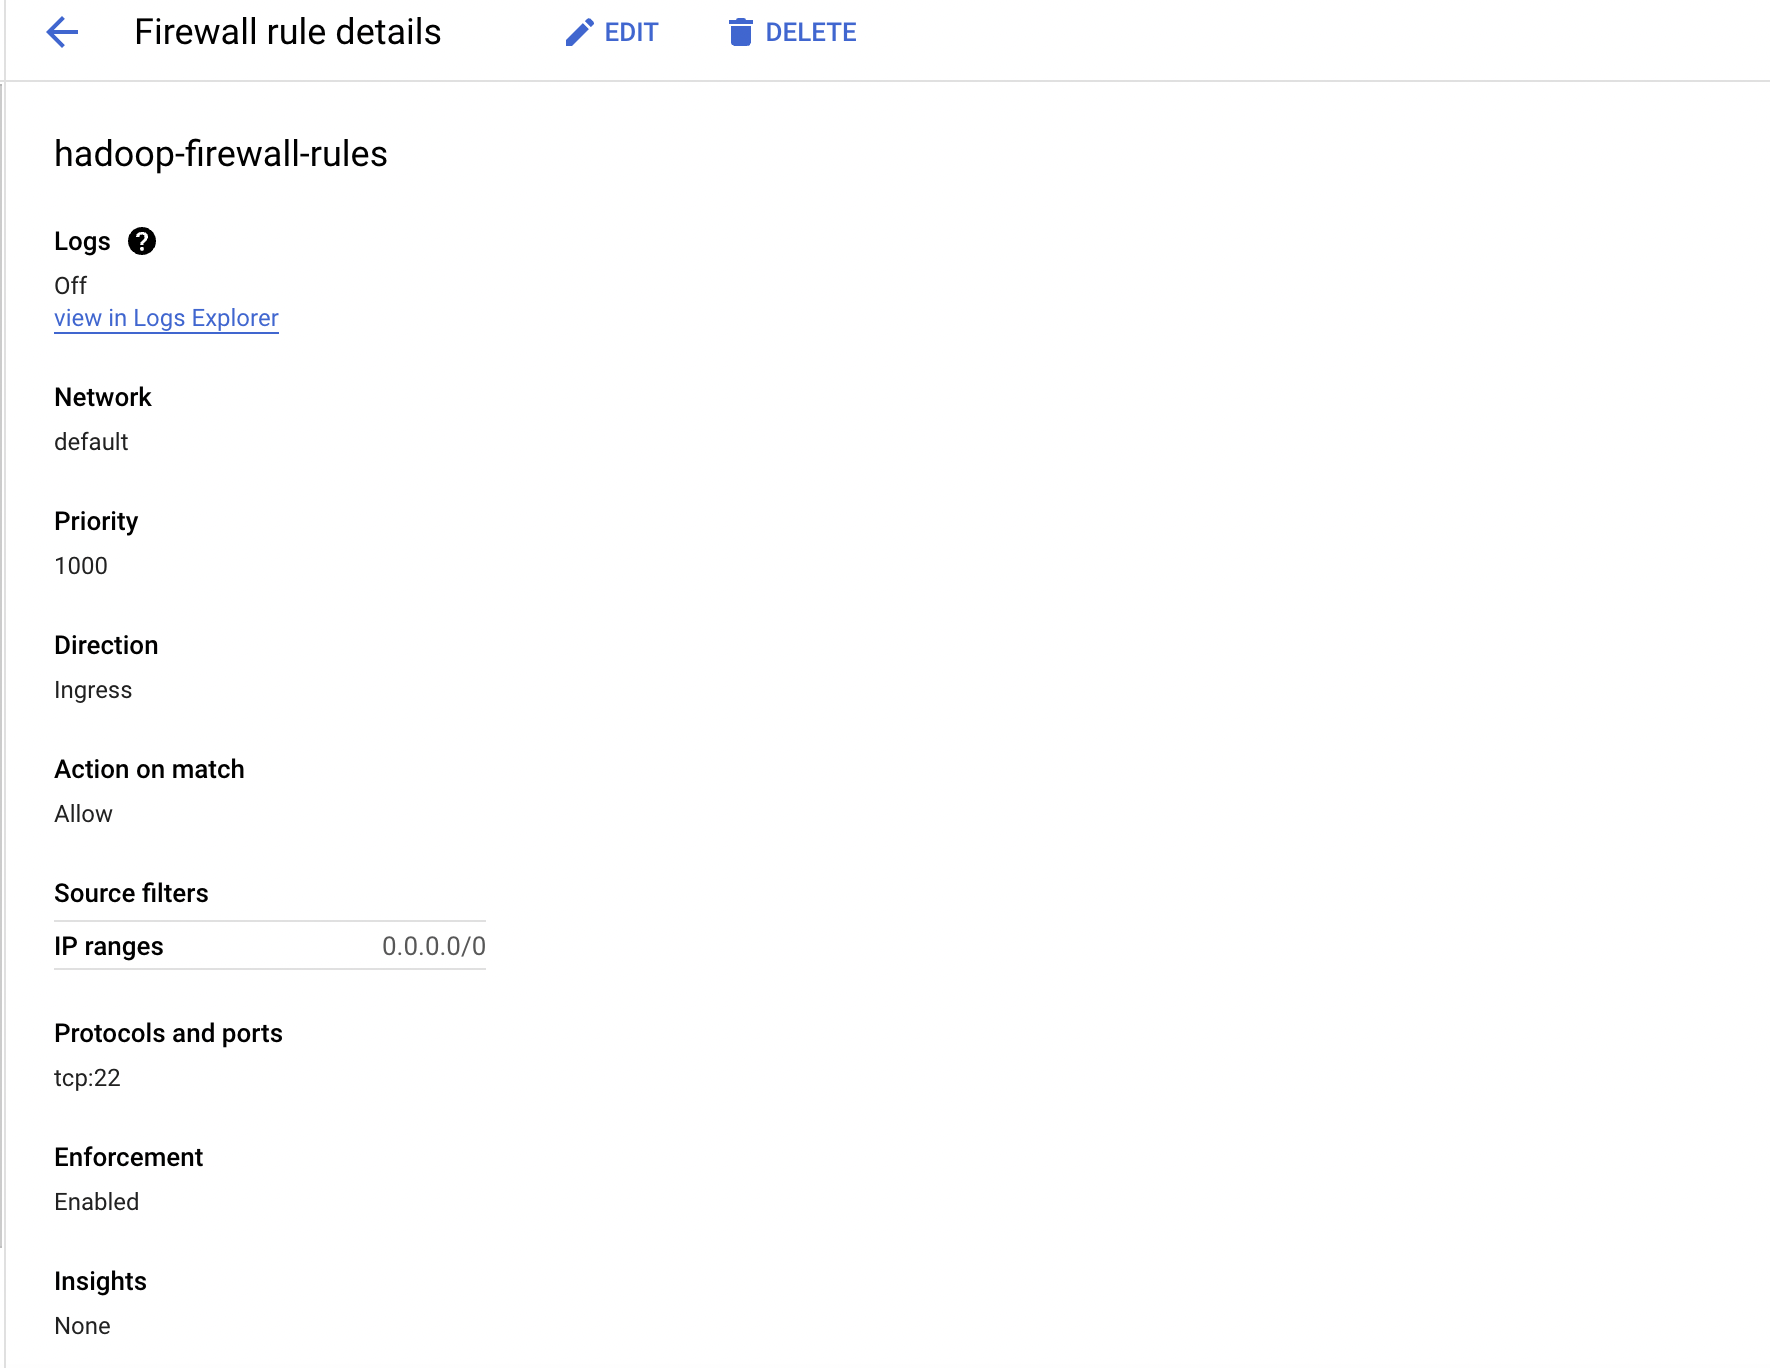
make sure to add firewall rules to vm's vpc which allows ssh connection on port 22, http connection on ports 9870 and 8088
Step 2: Prepare VM Instances
SSH into all VM instances and perform the following steps:
Update and upgrade the operating system.
 sudo apt-get update
 sudo apt-get upgrade
Install Java (OpenJDK 8):
sudo apt-get install openjdk-8-jdkAdd the JAVA_HOME variable to the
.bashrcfile and append it to the PATH variable.echo 'export JAVA_HOME=$(dirname $(dirname $(dirname $(readlink -f $(which java)))))' >> ~/.bashrc echo 'export PATH=$PATH:$JAVA_HOME/bin' >> ~/.bashrc source ~/.bashrc
Step 3: Download and Extract Hadoop
Download Hadoop from the Apache website and extract it on all the nodes.
I have used hadoop-3.2.3.tar.gz
wget https://dlcdn.apache.org/hadoop/common/hadoop-3.2.3/<hadoop_tar_file_name>
tar xzvf <hadoop_tar_file_name>
mv hadoop-3.2.3 hadoop
Step 4: Set Up SSH Key Pair for Communication
On the master node, generate an SSH key pair:
ssh-keygen -t rsa
Copy the master node's public key (.ssh/id_rsa.pub) to all worker nodes under the same path (.ssh/id_rsa.pub)
Create an authorized_keys file under the .ssh folder on all nodes:
cat ~/.ssh/id_rsa.pub > ~/.ssh/authorized_keys
Repeat this step for all worker nodes.
Create a config file inside the .ssh folder on the master node:
nano ~/.ssh/config
Add host configurations for master and worker nodes in the config file:
Host namenode
        HostName [master internal ip]
        User rahul_das
        IdentityFile ~/.ssh/id_rsa
Host workernode1
        HostName [worker internal ip]
        User rahul_das
        IdentityFile ~/.ssh/id_rsa
Host workernode2
        HostName [worker internal ip]
        User rahul_das
        IdentityFile ~/.ssh/id_rsa
This configuration allows master worker VMs to communicate using SSH with RSA keys.
Step 5: Configure Hadoop
Update Environment Variables
On all nodes, update the Hadoop environment files:
nano hadoop/etc/hadoop/*env*.sh

Add the following line to set the Java home path:
export JAVA_HOME=<path_to_java_home>
Add the entry for JAVA_HOME in mapred-env.sh , now add the same entry for JAVA_HOME to hadoop-env.sh, yarn-env.sh files.

Repeat this step for all nodes.
Configure core-site.xml
Detailed explanation on the hadoop config files and params can be found here
On the master node, edit the core-site.xml file:
nano hadoop/etc/hadoop/core-site.xml
Add the following configuration:
<configuration>
    <property>
        <name>fs.defaultFS</name>
        <value>hdfs://[master internal ip]:9000</value>
    </property>
    <property>
        <name>hadoop.tmp.dir</name>
        <value>/home/rahul_das/hadoop_dir/tmp</value>
    </property>
</configuration>
Set the IP address to the master node's internal IP.
Repeat the same configuration on all worker nodes, but use the master node's HDFS IP address.
Configure yarn-site.xml
Edit the yarn-site.xml file on the master node:
nano hadoop/etc/hadoop/yarn-site.xml
Add the following configuration:
<configuration>
    <property>
        <name>yarn.nodemanager.aux-services</name>
        <value>mapreduce_shuffle</value>
    </property>
    <property>
        <name>yarn.nodemanager.aux-services.mapreduce_shuffle.class</name>
        <value>org.apache.hadoop.mapred.ShuffleHandler</value>
    </property>
    <property>
        <name>yarn.resourcemanager.hostname</name>
        <value>[master internal ip]</value>
        <description>Hostname of yarn resource manager node</description>
    </property>
    <property>
        <name>yarn.resourcemanager.address</name>
        <value>[master internal ip]:8032</value>
        <description>Address of yarn resource manager</description>
    </property>
</configuration>
Replicate this configuration on all nodes, using the master node's IP address.
Configure hdfs-site.xml
Edit the hdfs-site.xml file on the master node:
nano hadoop/etc/hadoop/hdfs-site.xml
Add the following configuration:
<configuration>
    <property>
        <name>dfs.replication</name>
        <value>2</value>
    </property>
    <property>
        <name>dfs.namenode.name.dir</name>
        <value>file:/home/rahul_das/hadoop_dir/namenode_dir</value>
    </property>
    <property>
        <name>dfs.datanode.data.dir</name>
        <value>file:/home/rahul_das/hadoop_dir/datanode_dir</value>
    </property>
</configuration>
In worker nodes, add the configuration for the data node directory only.
Configure mapred-site.xml
Edit the mapred-site.xml file on the master node:
nano hadoop/etc/hadoop/mapred-site.xml
Add the following configuration:
<configuration>
    <property>
        <name>mapreduce.framework.name</name>
        <value>yarn</value>
    </property>
    <property>
        <name>mapreduce.jobhistory.address</name>
        <value>[master internal ip]:10020</value>
    </property>
</configuration>
Replicate this configuration on all nodes.
Create masters and workers files
On the master node, create a masters file:
echo "master-ip-1" > hadoop/etc/hadoop/masters
If you have a separate secondary name node, add its IP to the masters file as the second line.
Leave the masters file empty on worker nodes.
Create a workers file on the master node and add the IP addresses of all worker nodes to that file:
echo "worker-ip-1" > hadoop/etc/hadoop/workers
echo "worker-ip-2" >> hadoop/etc/hadoop/workers
# Add more worker IPs if needed
Only the master node and secondary name node should have an entry in the `
masters` file.
Step 6: Starting the Hadoop Cluster
Now we are all done with the configuration, to verify the configuration navigate inside the hadoop directory and execute the command
cd ~/hadoop
bin/hdfs namenode -format
If the verification completes without getting angry over some syntax issue in the xml config files, we are good to go ahead.
To start the Hadoop cluster run the below command from hadoop directory:
sbin/start-dfs.sh
sbin/start-yarn.sh
Now our hadoop cluster should be up and running with resource-manager (yarn) running on out master node
Run the jps command to verify if all processes are up on master node
jps

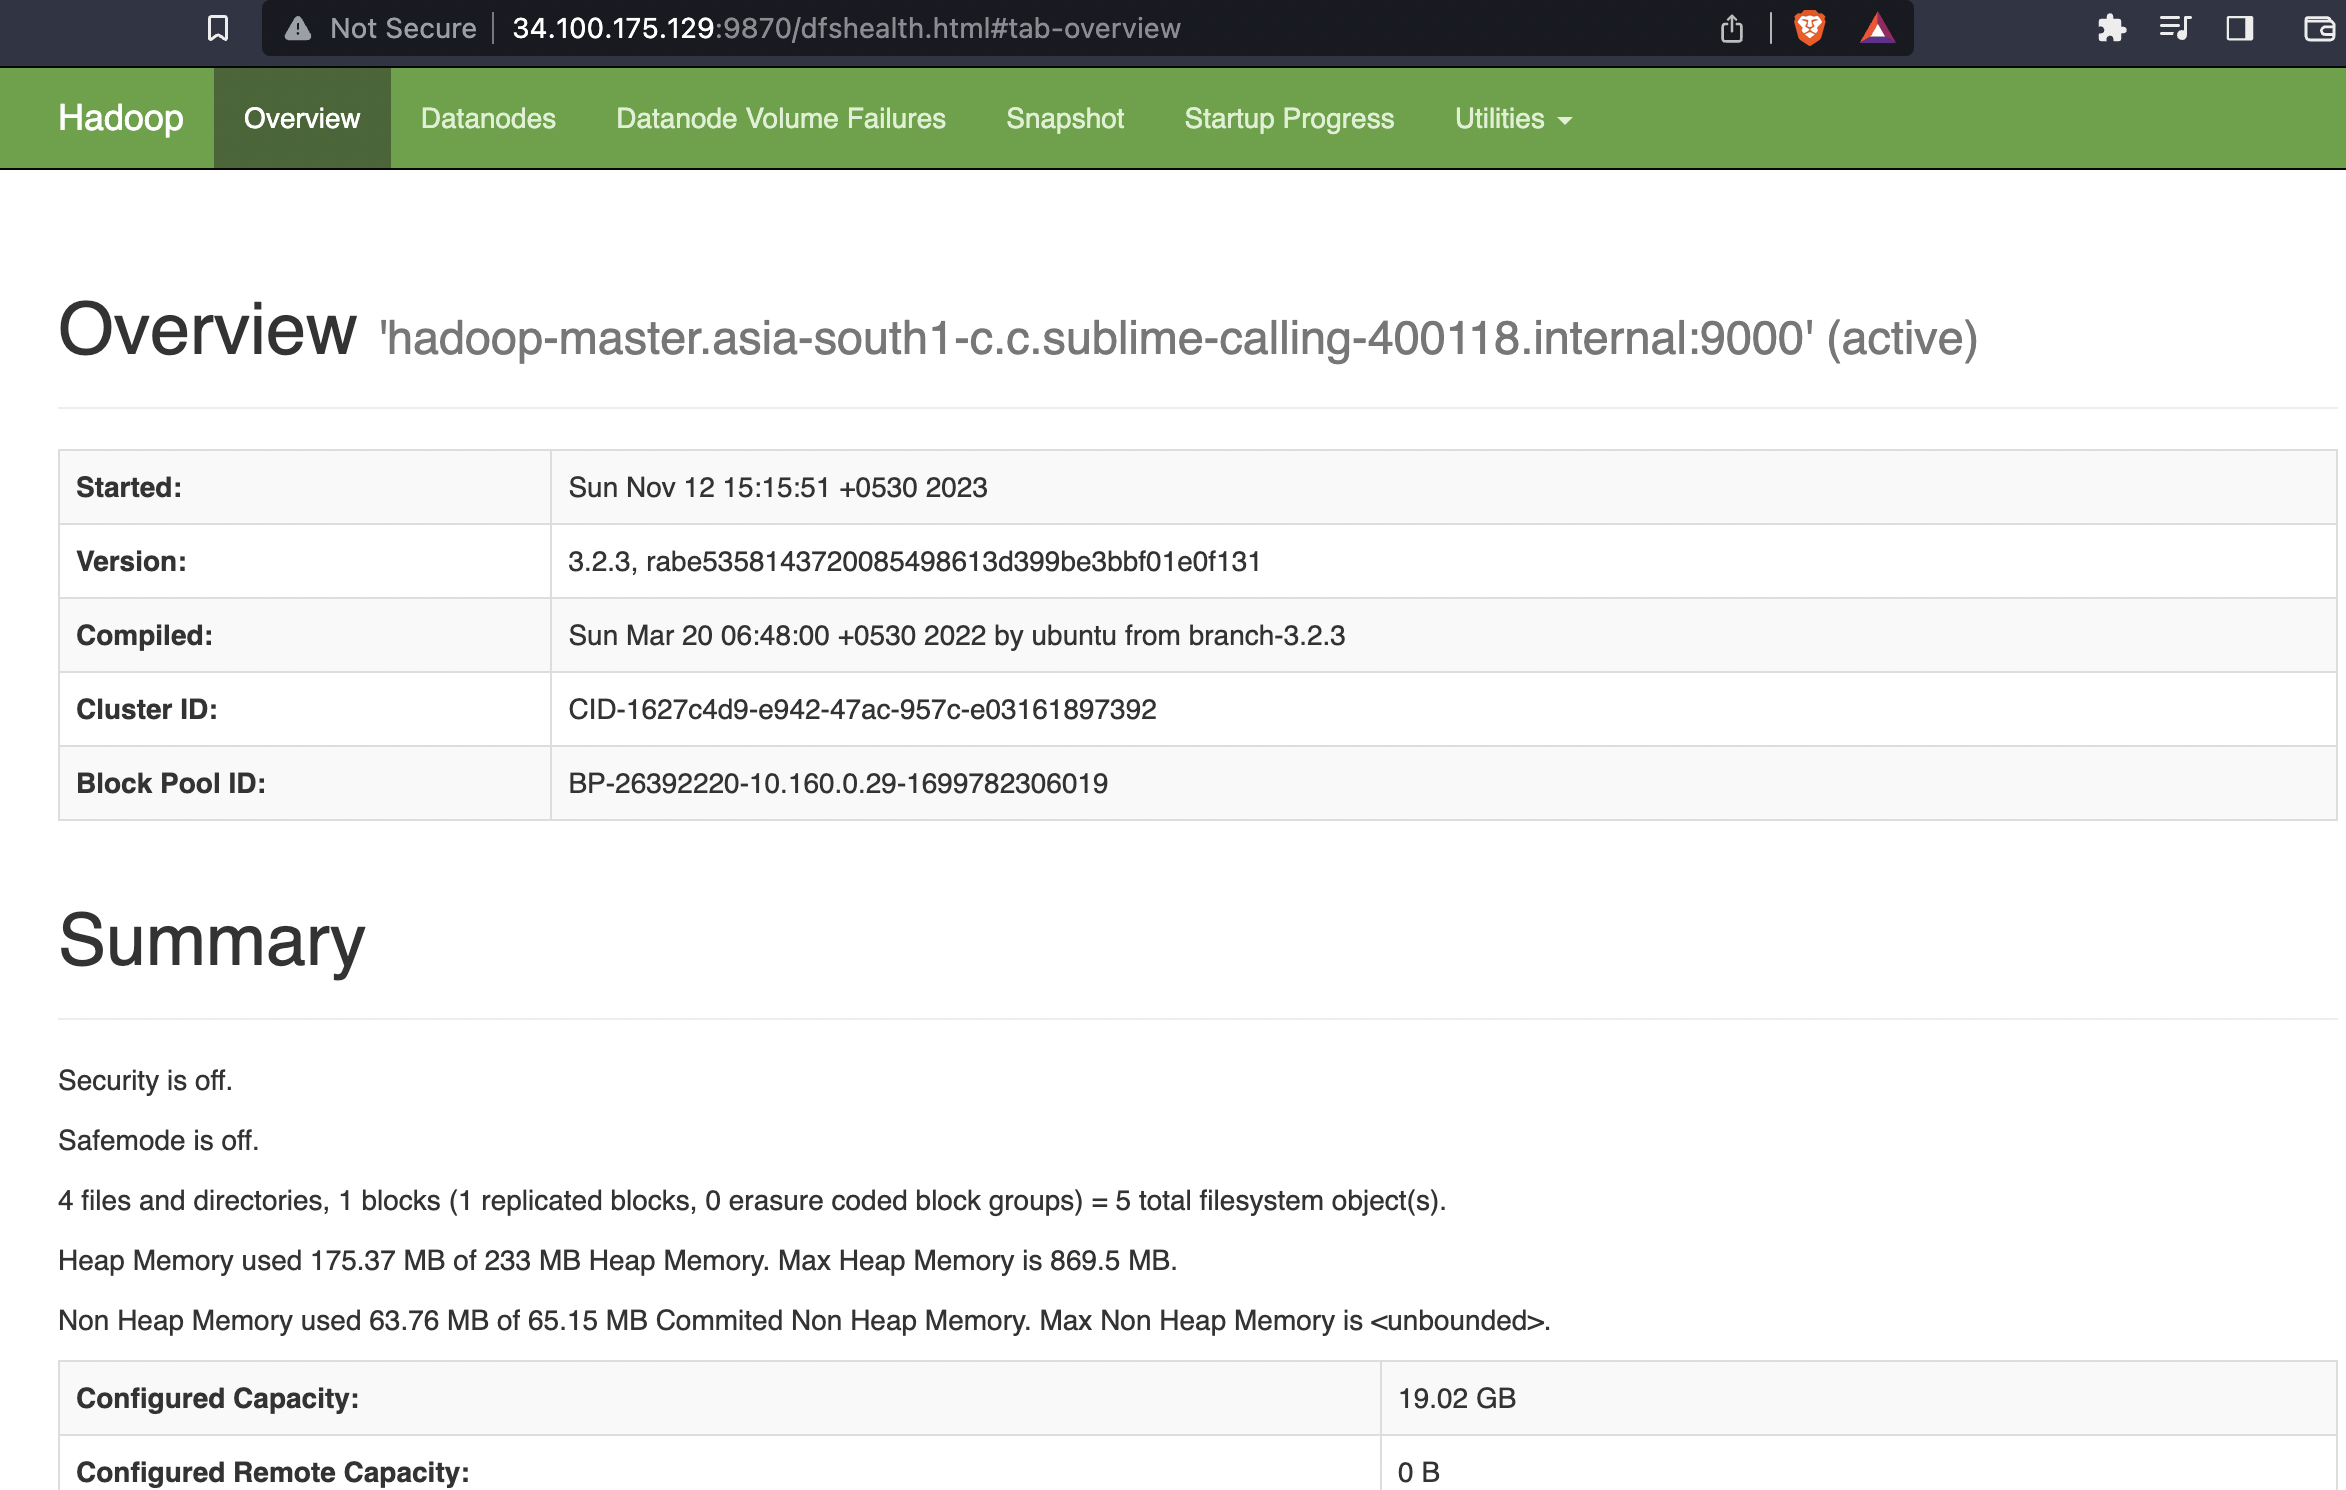
Accessing Hadoop Web UI
After completing the setup, you can access the Hadoop web UI:
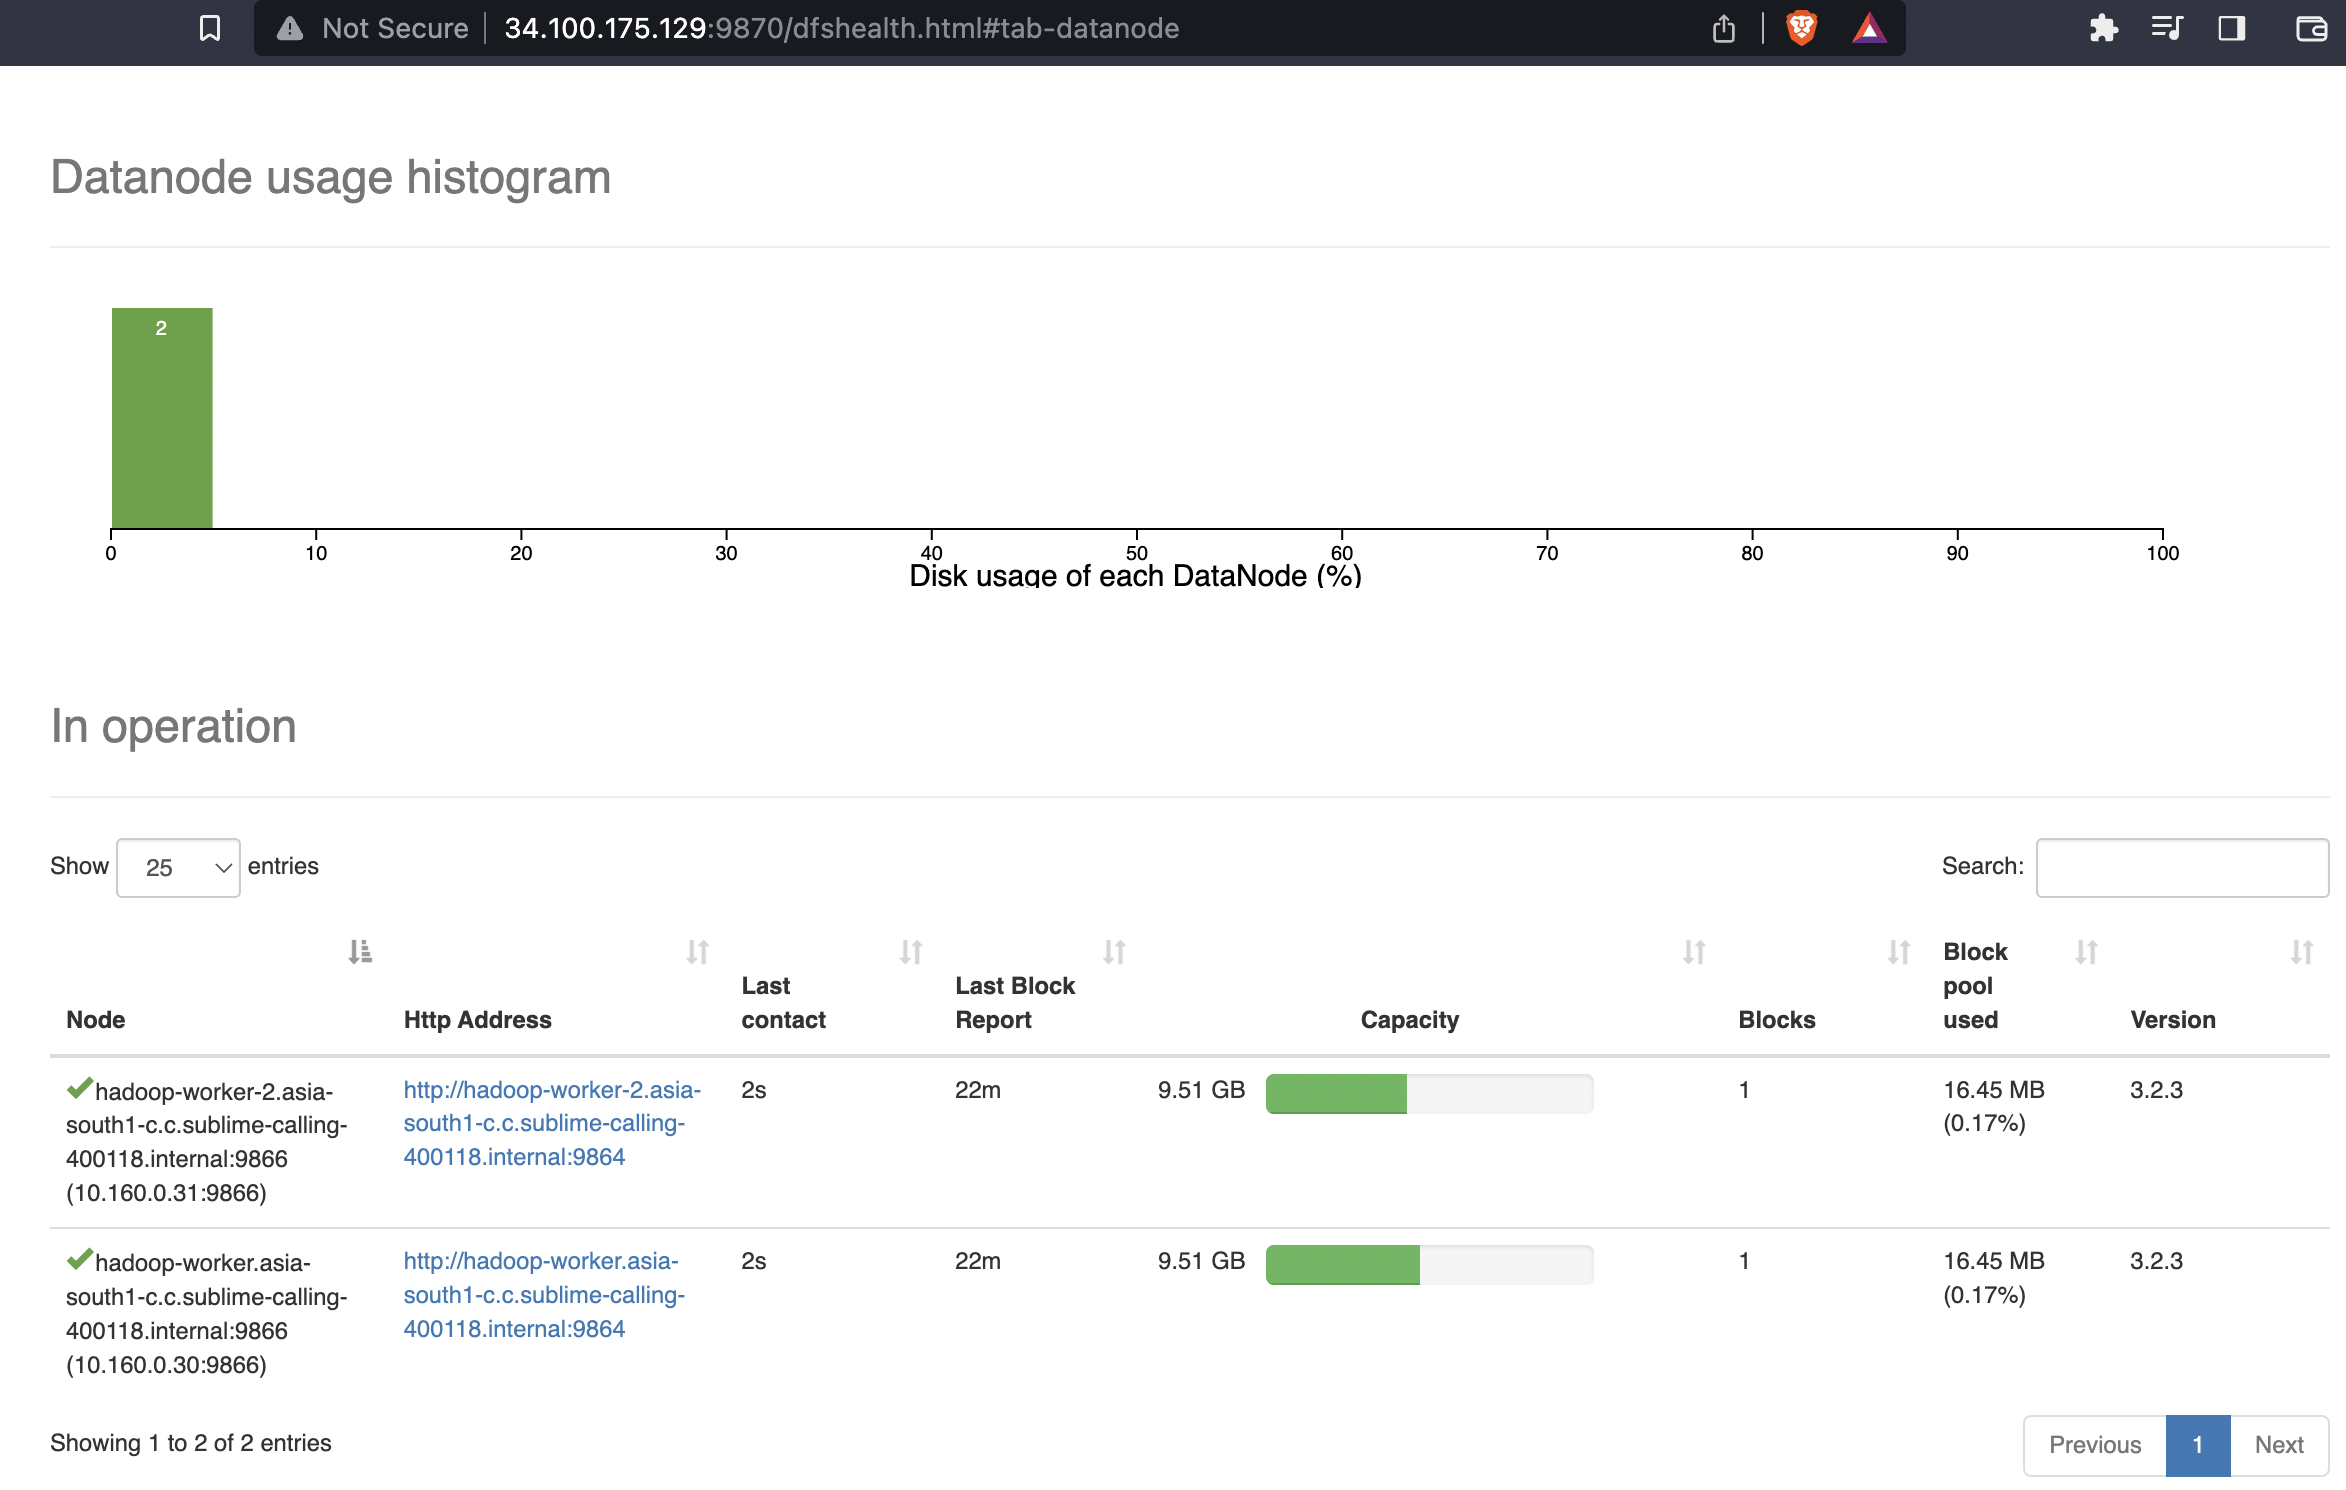
HDFS NameNode: http://[master-external-ip]:9870/
Hadoop Jobs UI: http://[master-external-ip]:8088/
Now you have a multi-node Hadoop cluster set up on Google Cloud! You can start running Hadoop jobs and processing big data.
This tutorial has guided you through each step of setting up the cluster, ensuring that it is user-friendly and easy to follow. Enjoy working with your Hadoop cluster!