Building a Simple Chat App with NodeJs using Websockets
Introduction
Websockets are a powerful tool for building real-time applications. They enable a bi-directional communication between clients in real time by establishing a persistent connection. This allows them to send and receive data between each other seamlessly without having to request for it.
Libraries like Socket.io can be used to implement websockets in your applications though it is not the only option there are many other websockets libraries available. In production, it is quite a challenging job to maintain and scale the websockets which comes with the overhead of managing the servers, and load balancers along with maintaining a state of the connections and having communication between the servers.
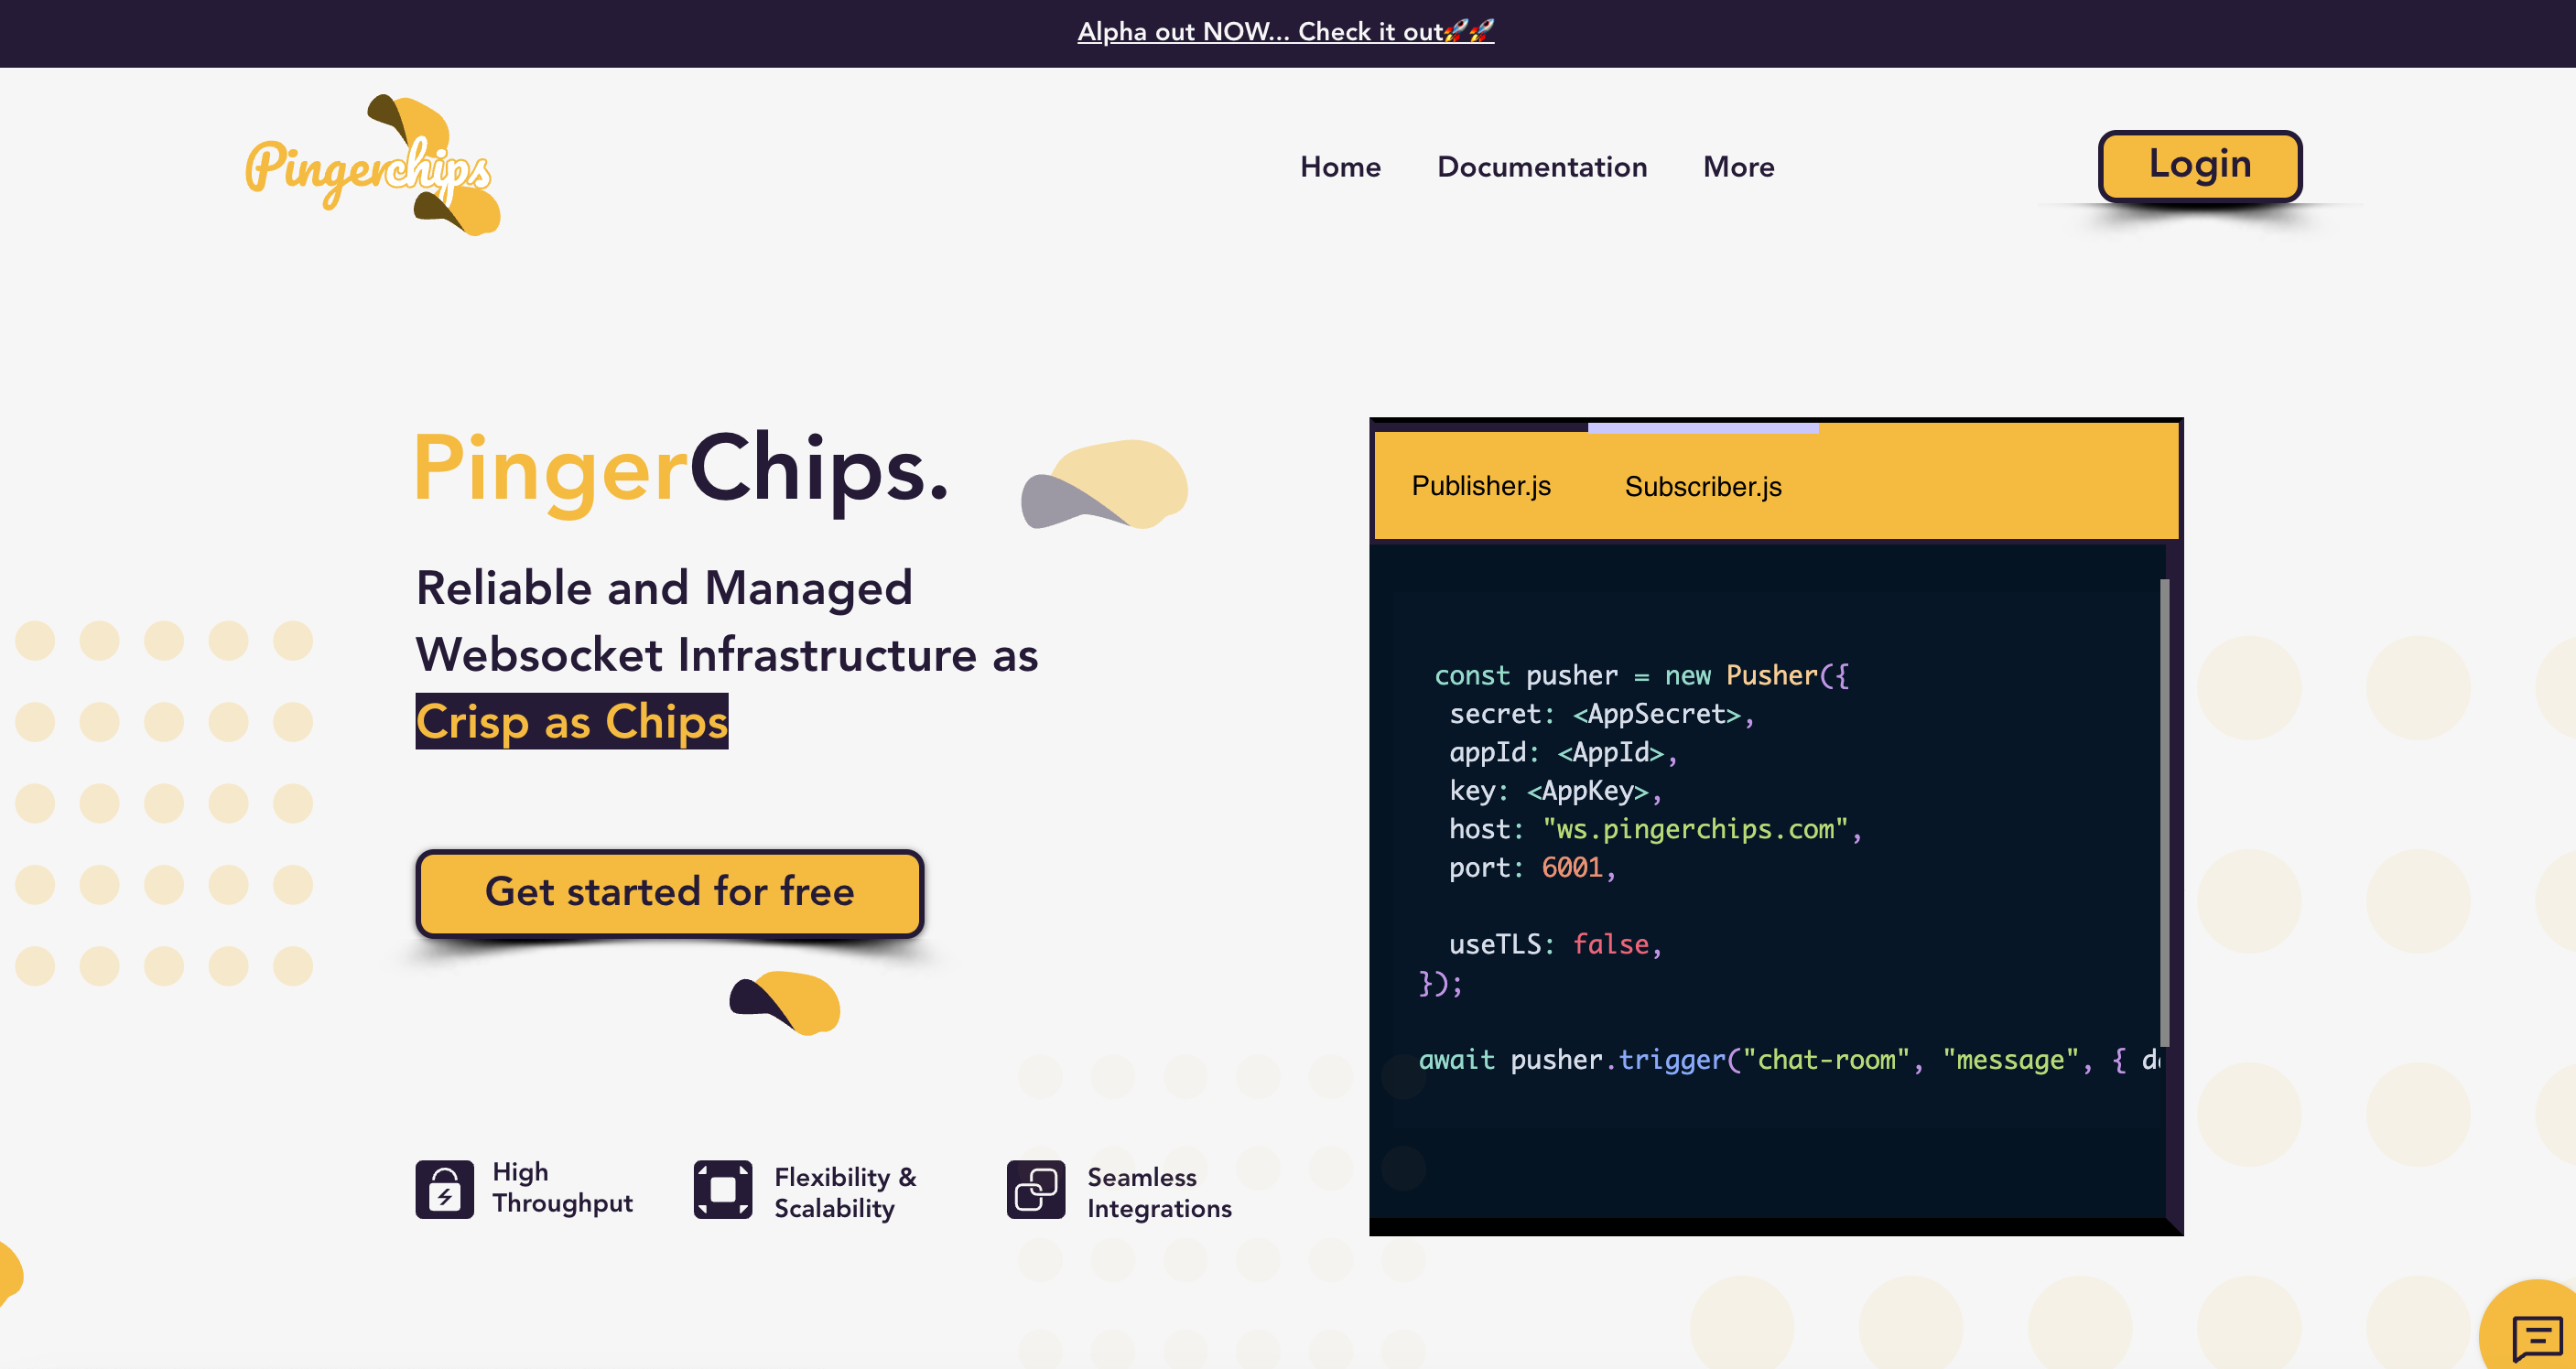
PingerChips is a hosted service that allows you to easily add real-time functionality to your applications. Other providers like Pusher provide similar services.
We will build a basic chat app that demonstrates how to send and receive messages in real time. In this tutorial, we will create a simple real-time chat application with NodeJs using PingerChips.
Step 1: Create a New Node.js Project
In your terminal, create a new Node.js project and navigate to the project directory:
mkdir simple-chat-app
cd simple-chat-app
npm init -y
Step 2: Install Required Dependencies
You need to install the necessary libraries: Express, Pusher
npm install express pingerchips-js
Step 3: Set Up PingerChips Account
Go to the PingerChips website and sign up for a free account.
Create a new app in your PingerChips dashboard to get your API credentials (App ID, Key, Secret).
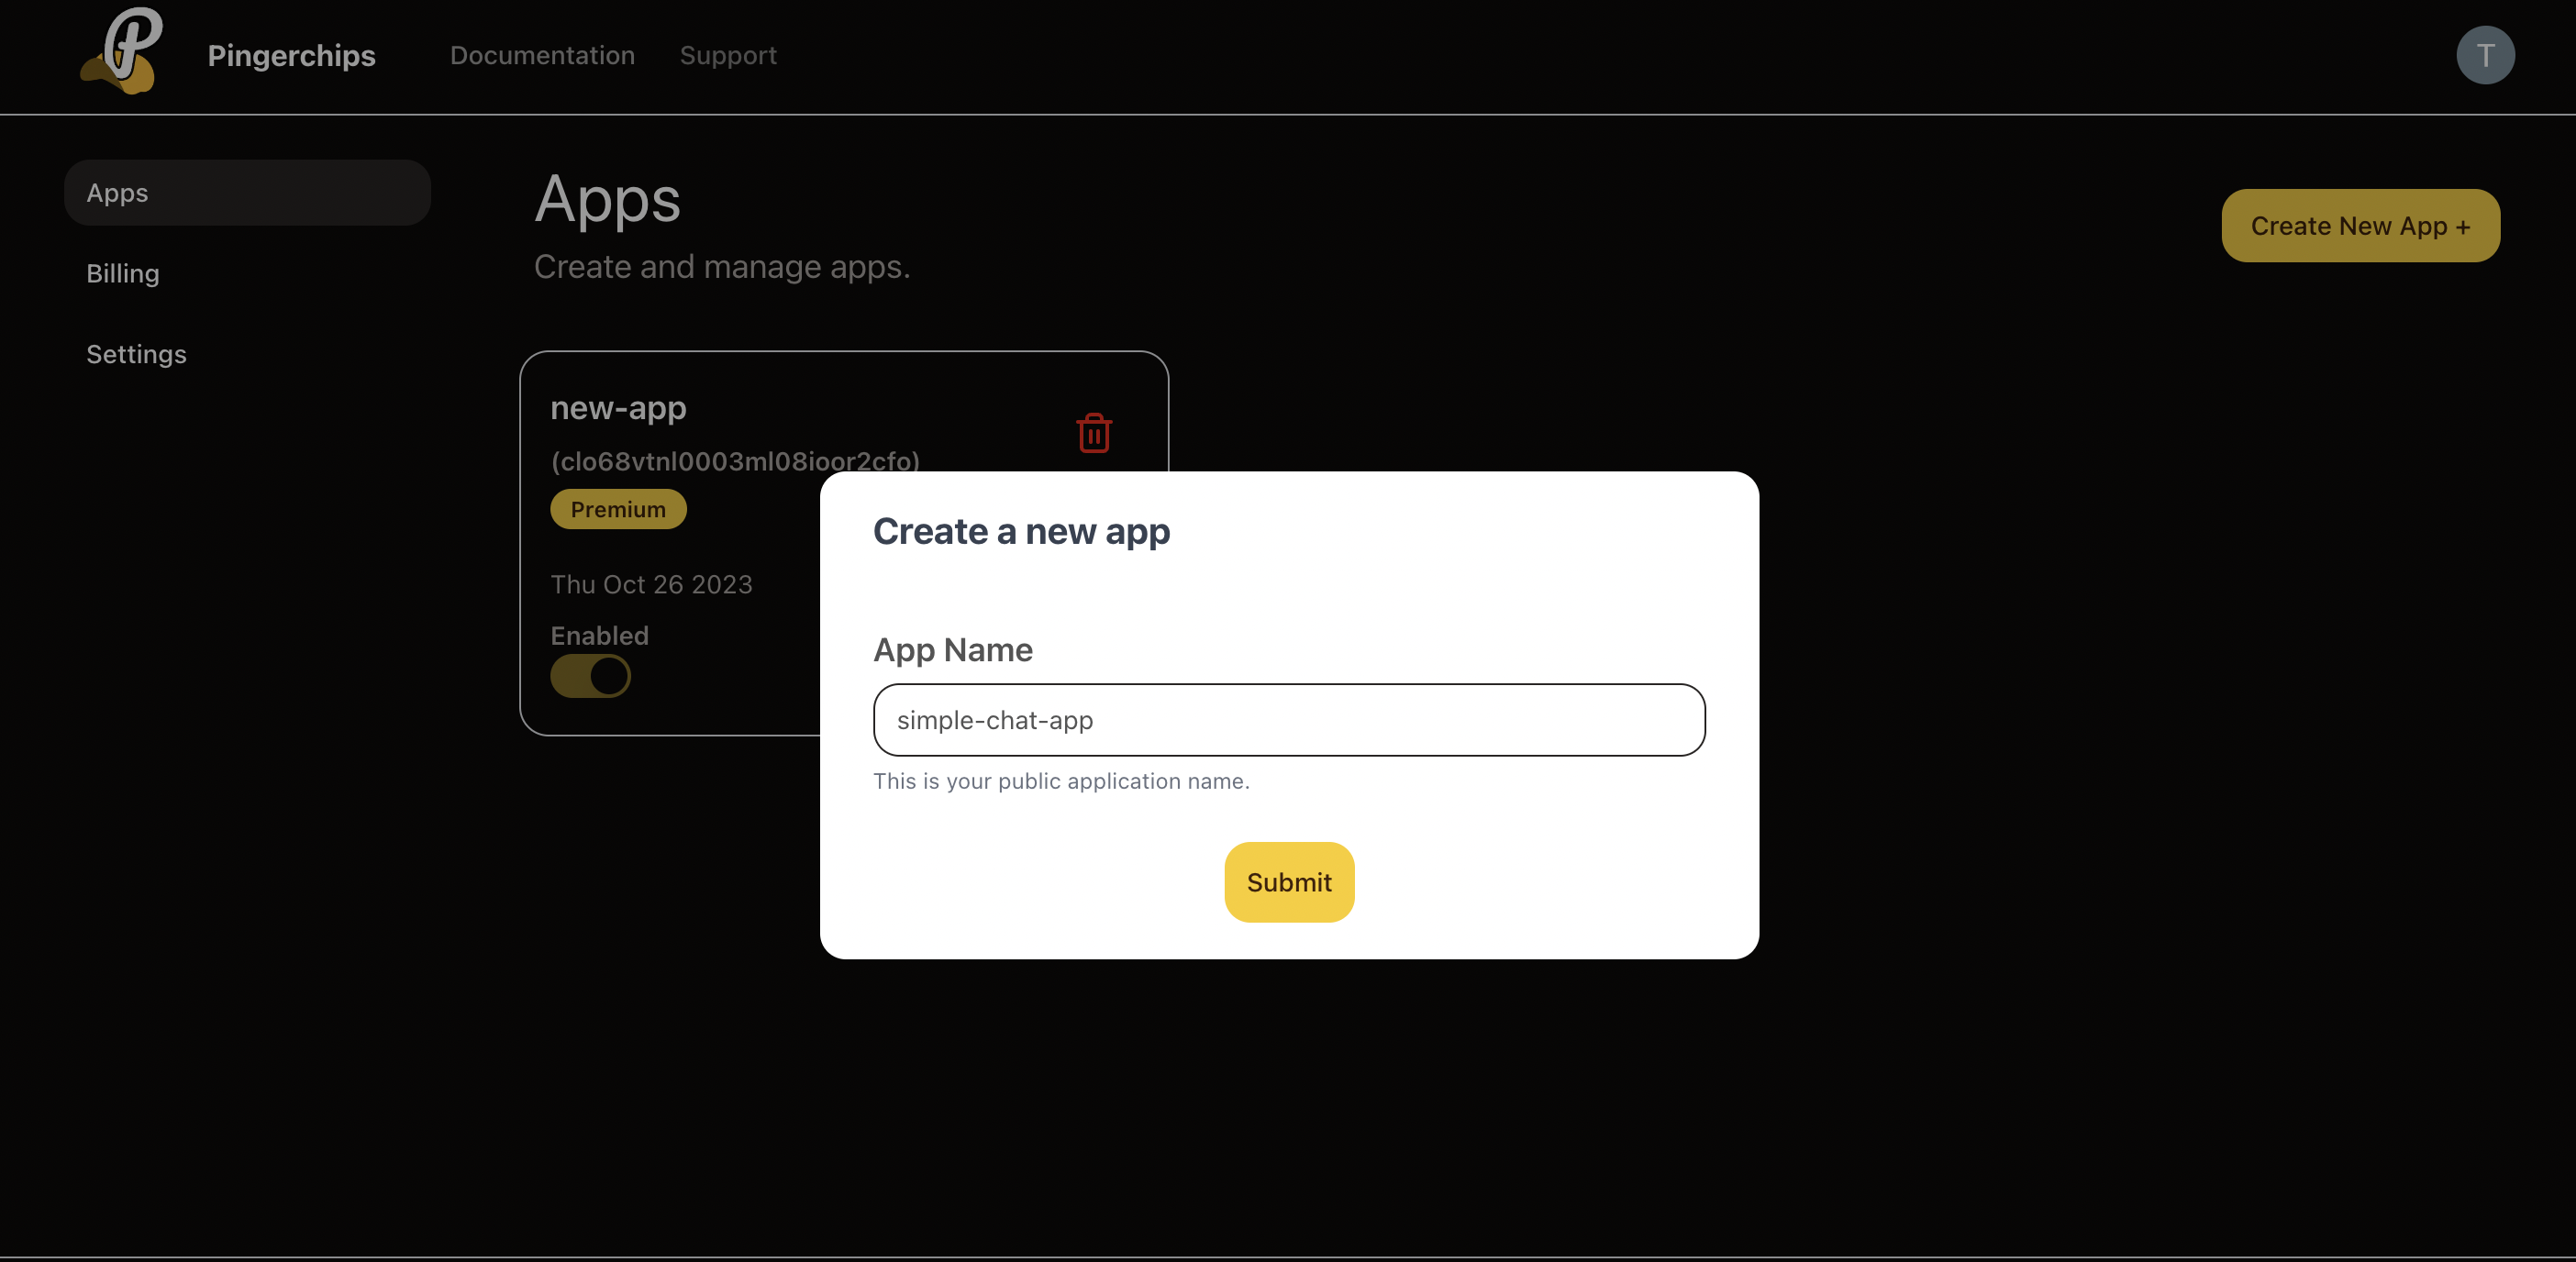
Take note of your app's credentials (App ID, Key, Secret).
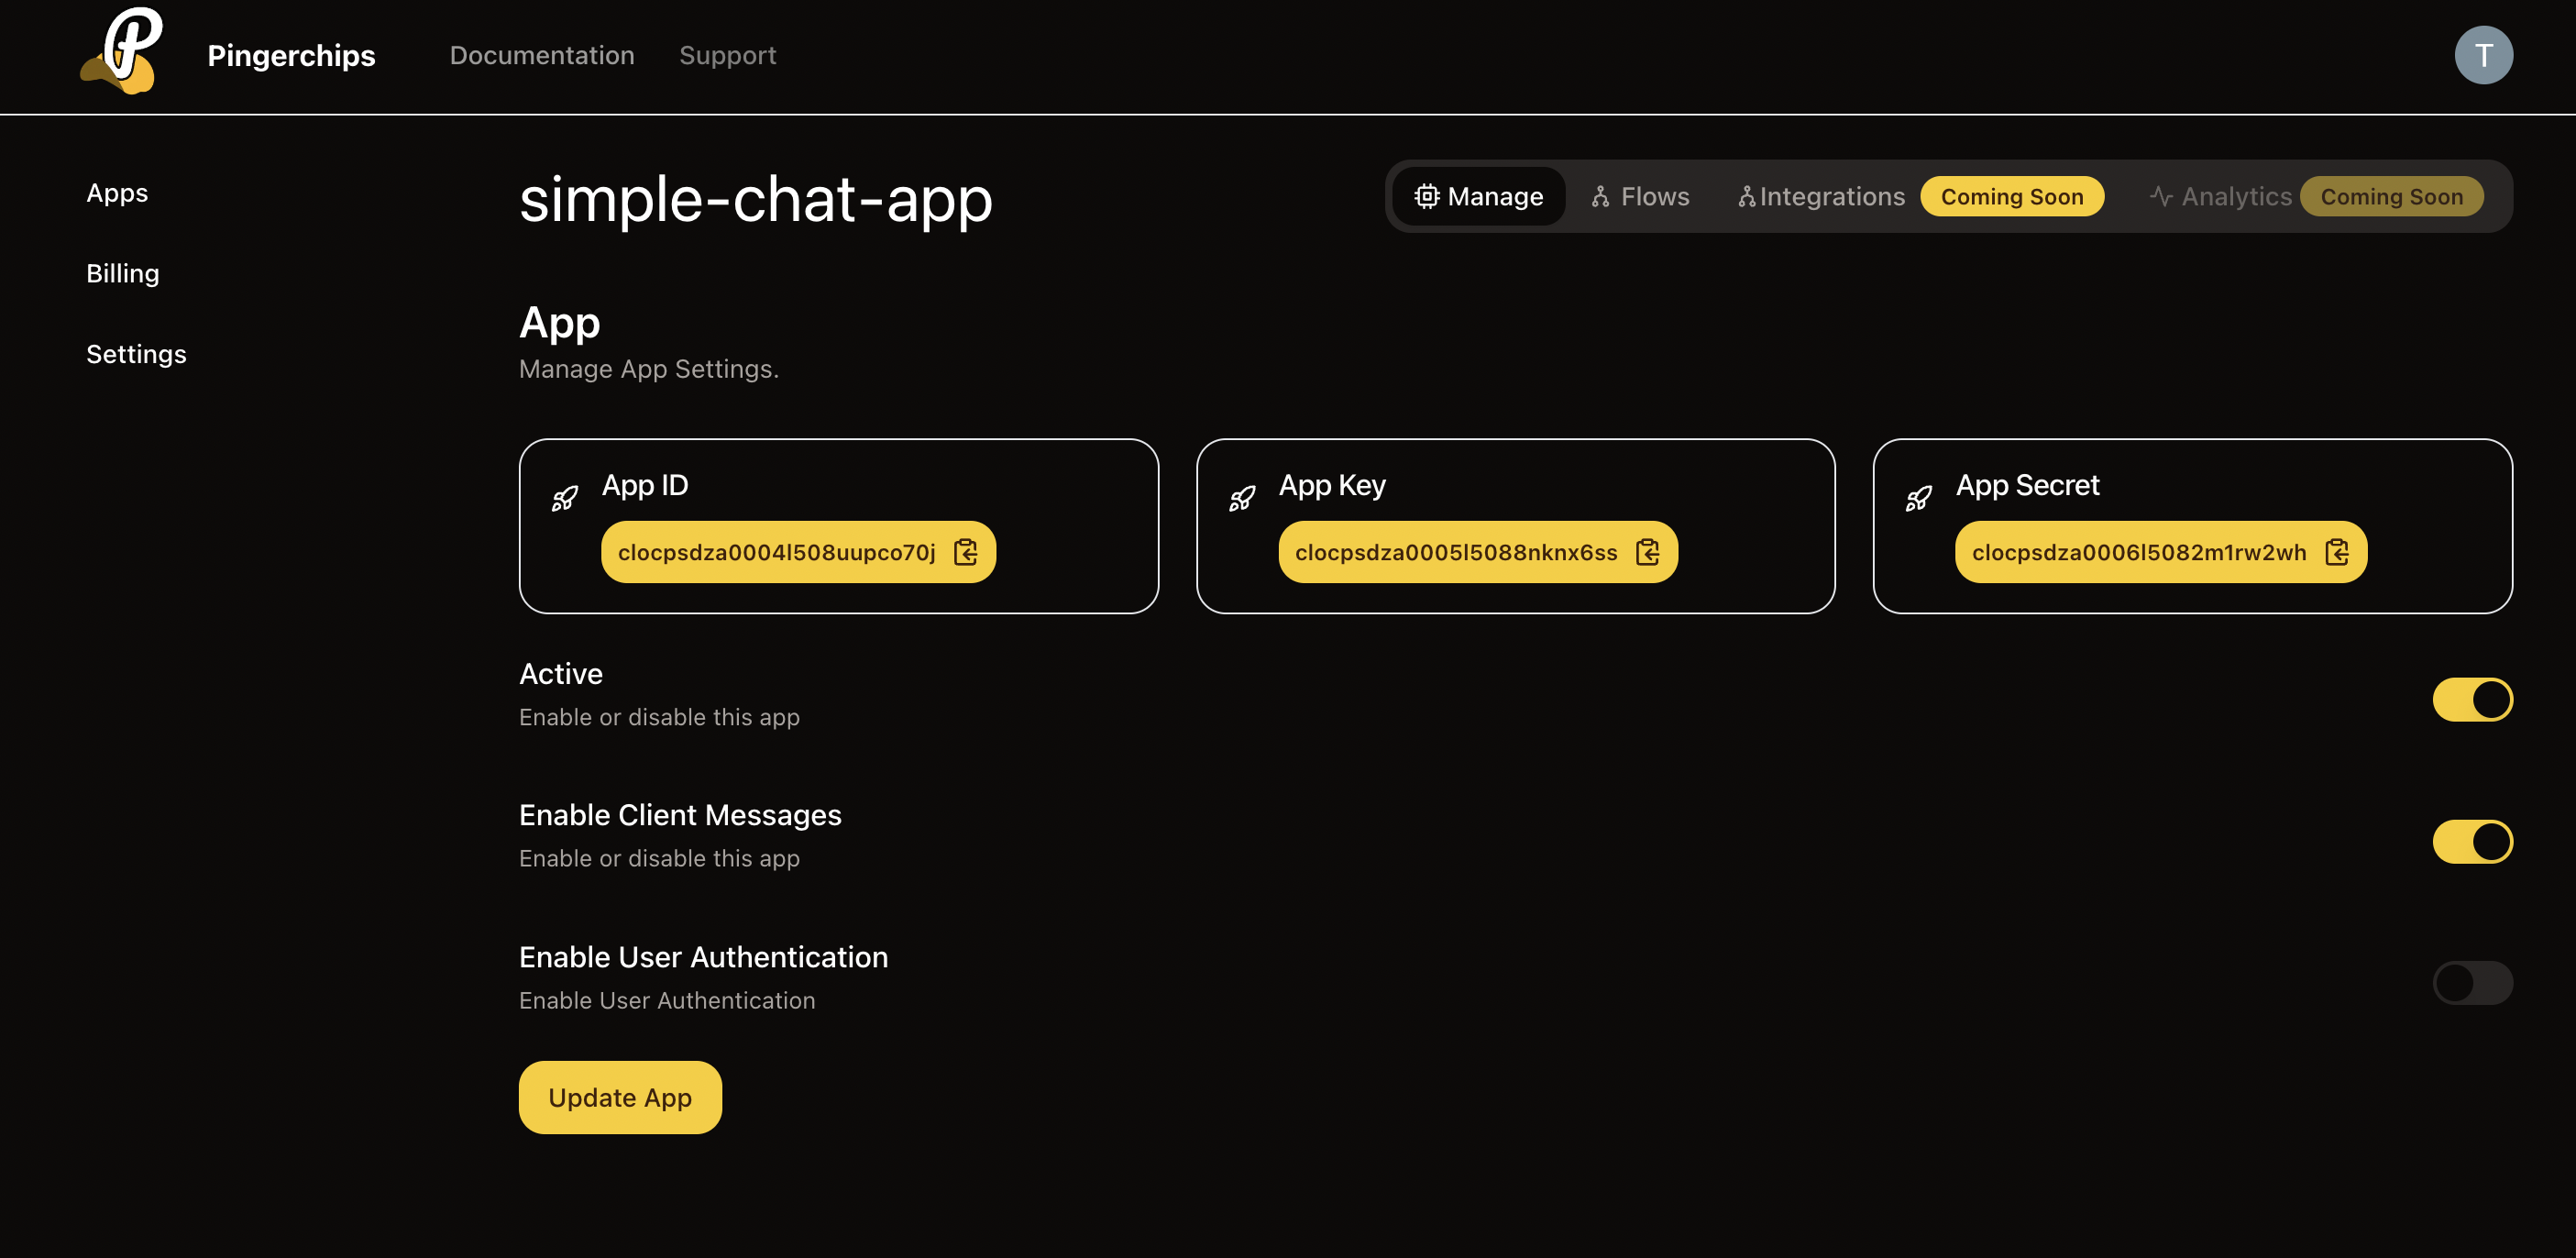
NOTE: Make sure client messages are enabled.
Step 4: Create the Express Server (server.js)
Create a file named server.js and set up your Express server to serve the static files in public folder:
const express = require("express");
const app = express();
const http = require("http").createServer(app);

app.use(express.static("public"));

http.listen(3000, () => {
    console.log("Server is running on http://localhost:3000");
});
Step 5: Create the HTML and JavaScript for the Chat Interface (public/index.html)
Create an index.html file inside a public folder to serve as the chat interface:
<!DOCTYPE html>
<html>
    <head>
        <title>Simple Chat App</title>
        <link rel="stylesheet" type="text/css" href="styles.css">
    </head>
    <body>
        <div id="chat">
            <div id="messages"></div>
            <input type="text" id="message" placeholder="Enter your message" />
            <button id="send">Send</button>
        </div>
        <script src="https://unpkg.com/pingerchips-js@1.0.1-a/dist/web/pingerchips.min.js"></script>
        <script src="app.js"></script>
    </body>
</html>
Step 8: Add CSS styling to our chat interface
Create an styles.css file inside a public folder to add styling to chat interface
#chat {
    max-width: 400px;
    margin: 0 auto;
    padding: 40px;
    background-color: #f0f0f0;
    border-radius: 10px;
    box-shadow: 0 0 10px rgba(0, 0, 0, 0.1);
  }

  /* Styles for the chat messages container */
  #messages {
    max-height: 300px;
    overflow-y: auto;
    background-color: #fff;
    border-radius: 5px;
    border: 1px solid #e1e1e1;
    padding: 20px;
  }

  /* Style for the chat input box */
  #message {
    width: 100%;
    padding: 10px;
    border: none;
    border-top: 1px solid #e1e1e1;
    font-size: 16px;
    background-color: #f5f5f5;
  }

  /* Style for the send button */
  #send {
    display: block;
    margin-top: 10px;
    padding: 10px 20px;
    background-color: #007BFF;
    color: #fff;
    border: none;
    border-radius: 5px;
    cursor: pointer;
  }

  /* Hover effect for the send button */
  #send:hover {
    background-color: #0056b3;
  }

  /* Focus effect for the input box */
  #message:focus {
    border-color: #007BFF;
    outline: none;
  }

  /* Chat message styles */
  .chat-message {
    background-color: #e2f7fe;
    border-radius: 5px;
    padding: 8px;
    margin: 8px 0;
  }

  /* Sender's chat message styles */
  .chat-message-sender {
    background-color: #dcf8c6;
    align-self: flex-end;
  }

  /* Time stamp for chat messages */
  .time-stamp {
    font-size: 12px;
    color: #777;
    margin-top: 5px;
    text-align: right;
  }

  /* Center the chat container */
  body {
    display: flex;
    justify-content: center;
    align-items: center;
    height: 100vh;
    margin: 0;
    background-color: #f0f0f0;
  }
Step 7: Create the Chat Logic (public/app.js)
Create an app.js file inside the public folder to handle the chat logic:
const pingerchips = new Pingerchips("<YOUR APP KEY>", {
    forceTLS: false,
    cluster: "mt1",
});

const messageInput = document.getElementById("message");
const messagesDiv = document.getElementById("messages");

// Subscribe to a Channel
// In this case it is analogous to group chat room, or personal chat room for messaging
const channel = pingerchips.subscribe("chat");

// Add an event listner which will trigger sendMessage function on click of send button
document.getElementById("send").addEventListener("click", () => {
    const message = messageInput.value;
    if (message) {
        sendMessage(message);
        messageInput.value = "";
    }
});

// Function to display the message on sender's UI
function newMessage(message) {
    const messageElement = document.createElement("div");
    messageElement.textContent = "me: " + message;
    messagesDiv.appendChild(messageElement);
}

//Function to publish message over the subscribed channel "chat" with message event "client-message"
function sendMessage(message) {
    newMessage(message);
    channel.trigger("client-message", {
        text: message,
    });
}

// Setup a listner on same channel "chat" to listen for message events named "client-message"
// Display the recieved events on UI
channel.bind("client-message", (data) => {
    const messageElement = document.createElement("div");
    messageElement.textContent = "sender: " + data.text;
    messagesDiv.appendChild(messageElement);
});
Step 8: Start the Server
In your terminal, run the following command to start the Node.js server:
node server.js
Your chat app should now be accessible at http://localhost:3000.
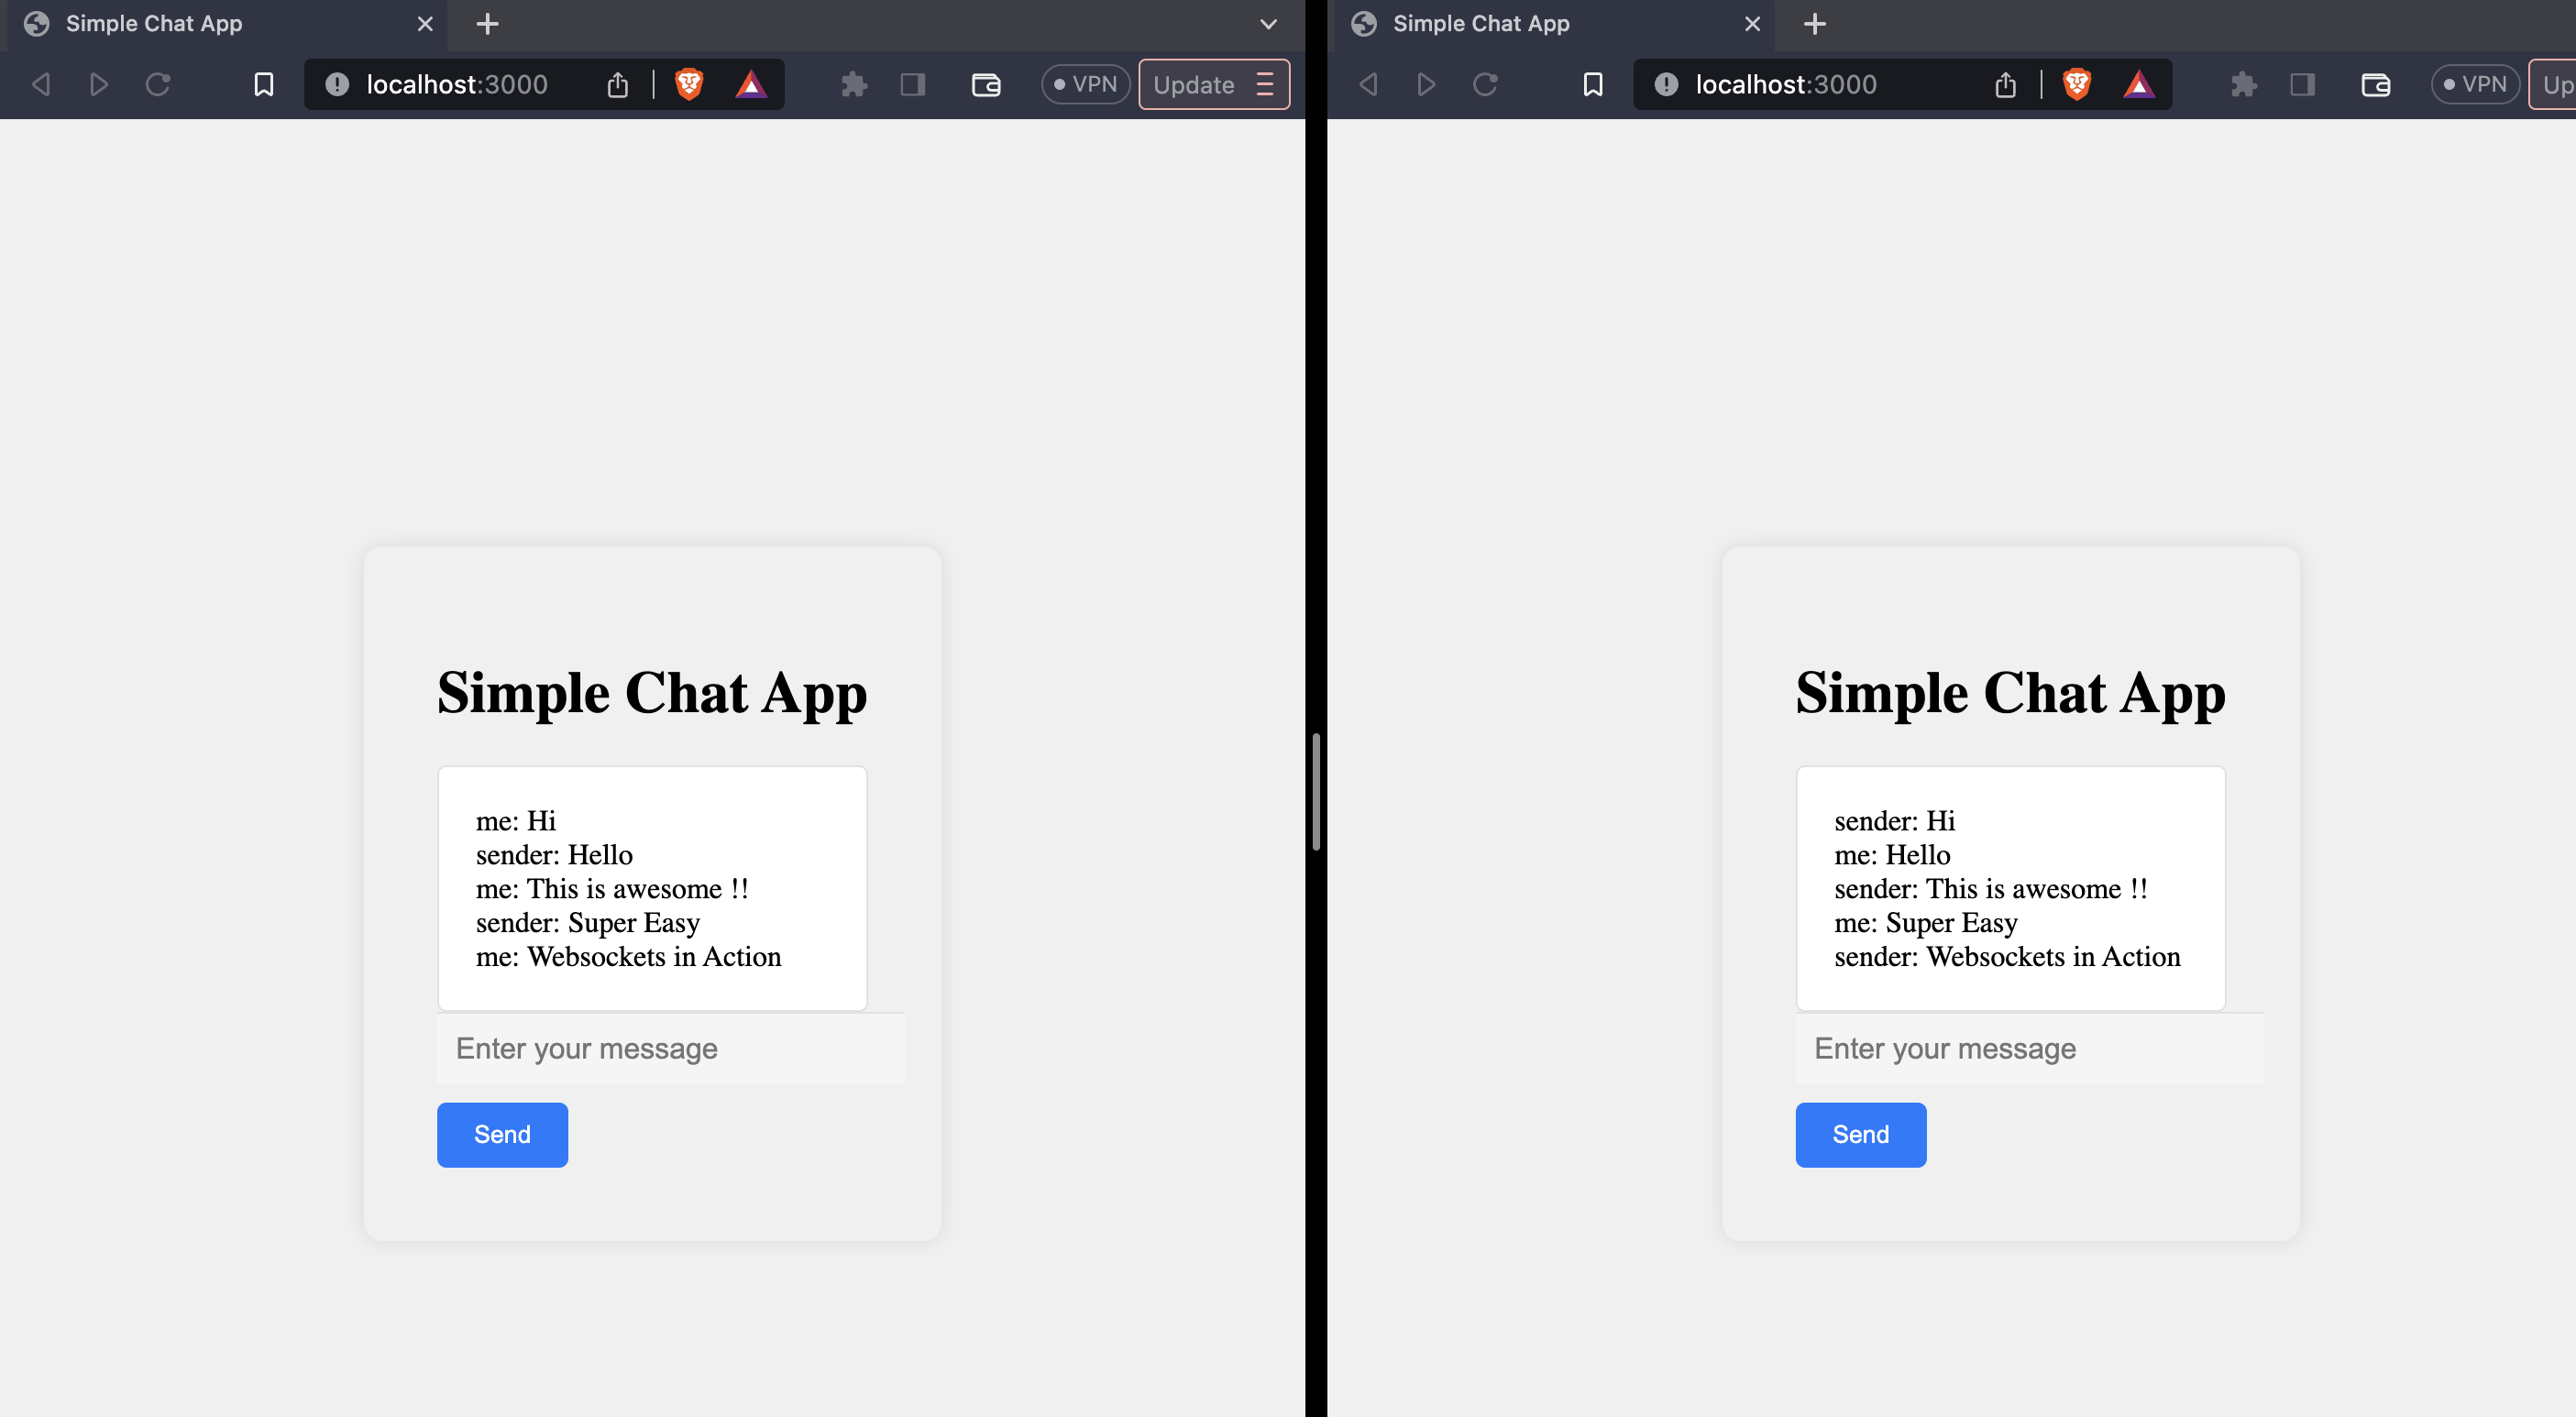
That's it! You've created a simple chat app using Node.js and PingerChips. Users can send and receive messages in real-time using PingerChips. Customize and expand the functionality as needed for your application. If you encounter any issues, make sure to check your app credentials and verify that you've followed each step correctly.
Code for the above example can be found here.